Fast Iterative Development on Kubernetes with Telepresence - Cloud Native Tool #003
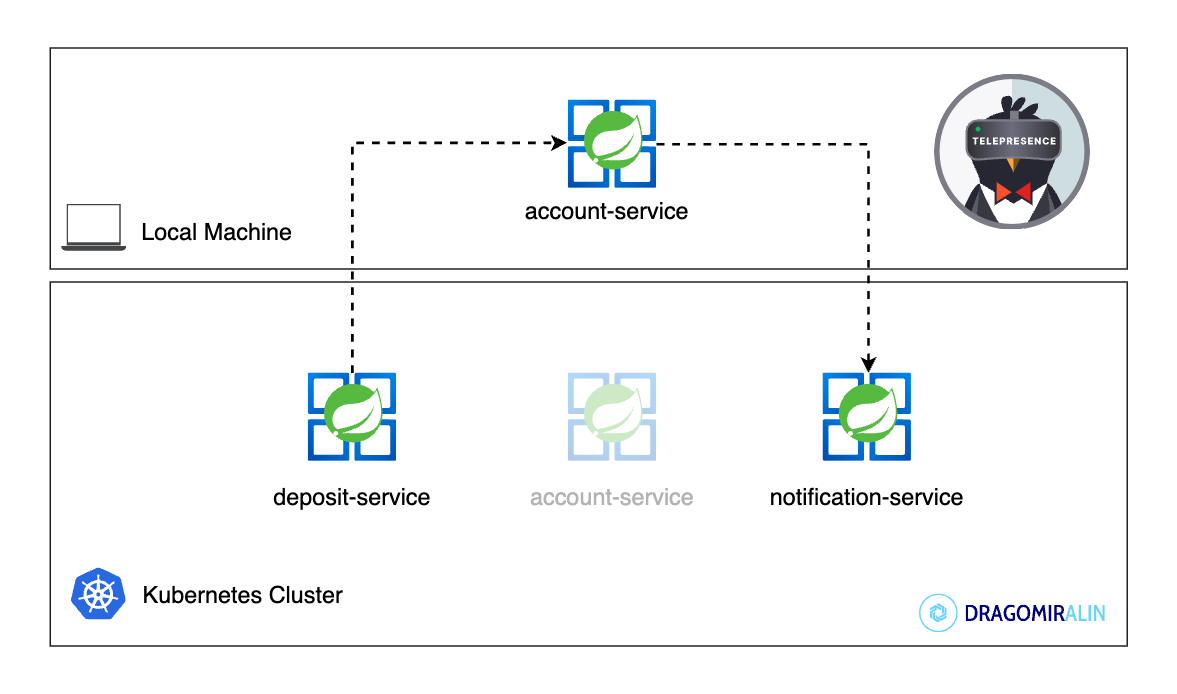
In this article, you will discover another cloud tool to improve your development workflow on Kubernetes: Telepresence. Telepresence helps us to develop and debug Kubernetes microservices locally and speed up the development workflow.
1. What is Telepresence?
Telepresence.io is an open-source tool that allows us to set up remote development environments on Kubernetes while having the local development experience.
- Telepresence is a CLI tool that runs on macOS, Linux, and Windows.
- It uses a two-way network proxy to route traffic between a local process and a remote Kubernetes cluster.
- Telepresence is a CNCF project and is maintained by the Ambassador Labs team.
2. Prerequisites
- A Kubernetes cluster (Minikube, Docker Desktop, or any other Kubernetes cluster)
- kubectl CLI tool
3. Install Telepresence
Let’s start by installing Telepresence on our local machine. Installation instructions are available on the official website.
1
2
3
4
5
6
7
8
9
10
11
12
13
14
15
# Intel Macs

# 1. Download the latest binary (~105 MB):
sudo curl -fL https://app.getambassador.io/download/tel2oss/releases/download/v2.17.0/telepresence-darwin-amd64 -o /usr/local/bin/telepresence

# 2. Make the binary executable:
sudo chmod a+x /usr/local/bin/telepresence

# Apple silicon Macs

# 1. Download the latest binary (~101 MB):
sudo curl -fL https://app.getambassador.io/download/tel2oss/releases/download/v2.17.0/telepresence-darwin-arm64 -o /usr/local/bin/telepresence

# 2. Make the binary executable:
sudo chmod a+x /usr/local/bin/telepresence
After installing Telepresence CLI, let’s install the Telepresence Kubernetes controller on our Kubernetes cluster.
1
telepresence helm install
Connect Telepresence to the Kubernetes cluster.
1
telepresence connect
4. Deploy microservices
We will deploy three microservices: account-service, deposit-service, and notification-service.
account-service: gets the account informationdeposit-service: makes a deposit to an account (callsaccount-serviceto get account andnotification-serviceto notify the customer)notification-service: sends a notification to the customer
Check the source code on GitHub
Each microservice has a README.md file with instructions on how to build and deploy the microservice.
After deploying the microservices, we can check if the microservices are running on Kubernetes.
1
2
3
4
5
kubectl get pods
NAME                                    READY   STATUS    RESTARTS   AGE
notification-service-58df65d7b5-d9jpt   1/1     Running   0          5m
account-service-75568f64f8-98qq8        1/1     Running   0          5m
deposit-service-8fddc6b9-b4nwx          1/1     Running   0          5m
5. Scenario 1: Develop a microservice locally and use other microservices running on Kubernetes
Our microservice needs other microservices to work properly. For example, the deposit-service needs the account-service
and the notification-service to work properly.
Let’s develop the deposit-service locally and use the account-service and the notification-service running on
Kubernetes.
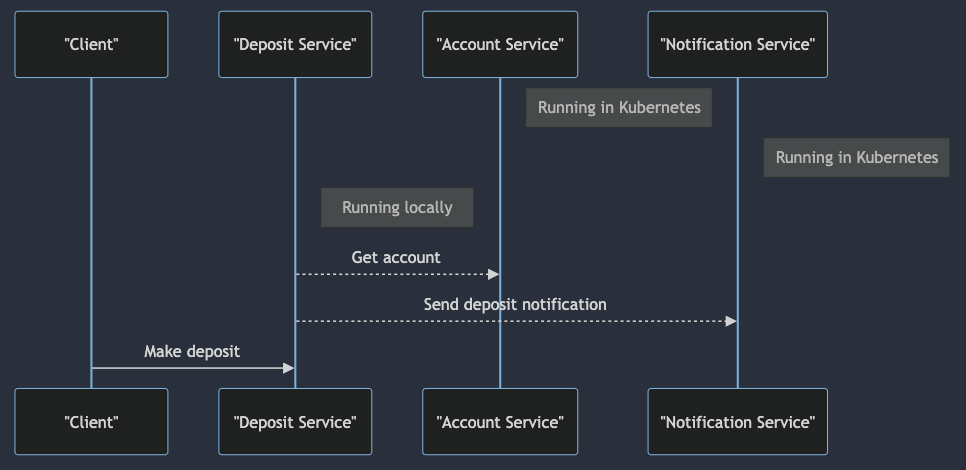
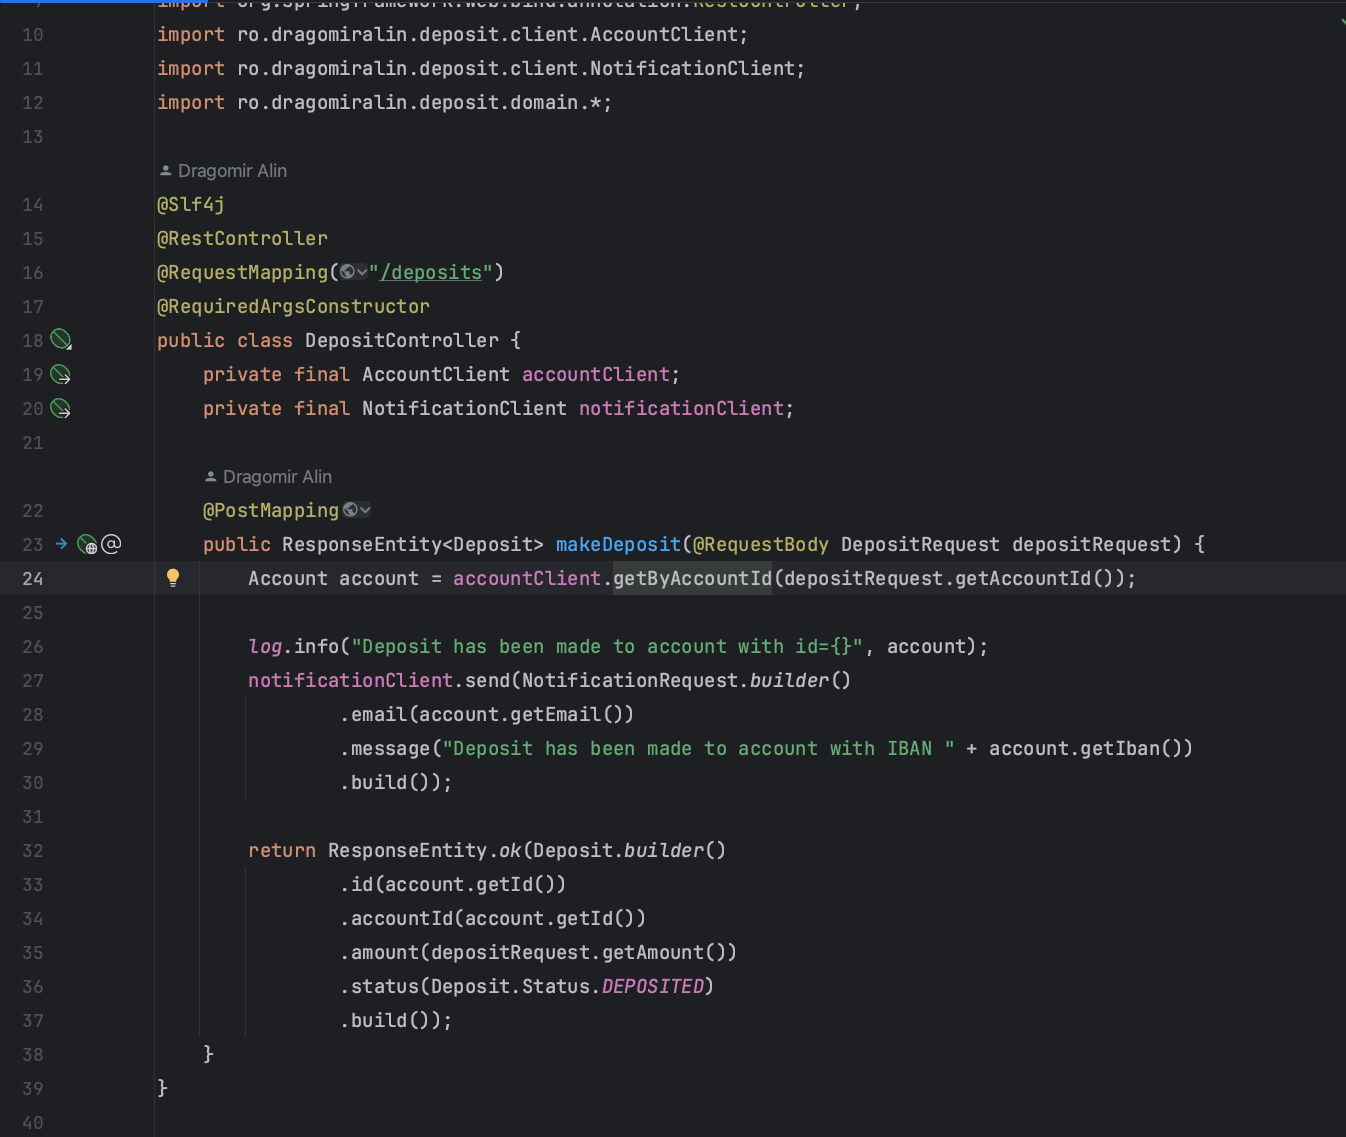
Start deposit-service locally in our IDE.
Let’s check if Telepresence is connected to the Kubernetes cluster.
1
2
3
4
telepresence list
account-service     : ready to intercept (traffic-agent not yet installed)
deposit-service     : ready to intercept (traffic-agent not yet installed)
notification-service: ready to intercept (traffic-agent not yet installed)
Let’s start by intercepting the deposit-service.
1
telepresence intercept deposit-service --port 8881:8881
Check if the deposit-service is intercepted.
1
2
3
4
5
6
7
8
9
10
telepresence list
account-service     : ready to intercept (traffic-agent not yet installed)
deposit-service     : intercepted
   Intercept name         : deposit-service
   State                  : WAITING
   Workload kind          : Deployment
   Destination            : 127.0.0.1:8881
   Service Port Identifier: http
   Intercepting           : all TCP connections
notification-service: ready to intercept (traffic-agent not yet installed)
Let’s call the deposit-service endpoint to check if it works properly.
1
2
3
4
5
6
7
8
http POST http://localhost:8881/deposits accountId=5 amount=5

{
    "accountId": 5,
    "amount": 5.0,
    "id": 5,
    "status": "DEPOSITED"
}
Now, we can start developing our microservice locally. We can use our favorite IDE and debug the code as we would do
with any other local application and notification-service and account-service running on Kubernetes.
Clean up the Telepresence agent.
1
telepresence uninstall --agent deposit-service
6. Scenario 2: Debugging a microservice running on Kubernetes
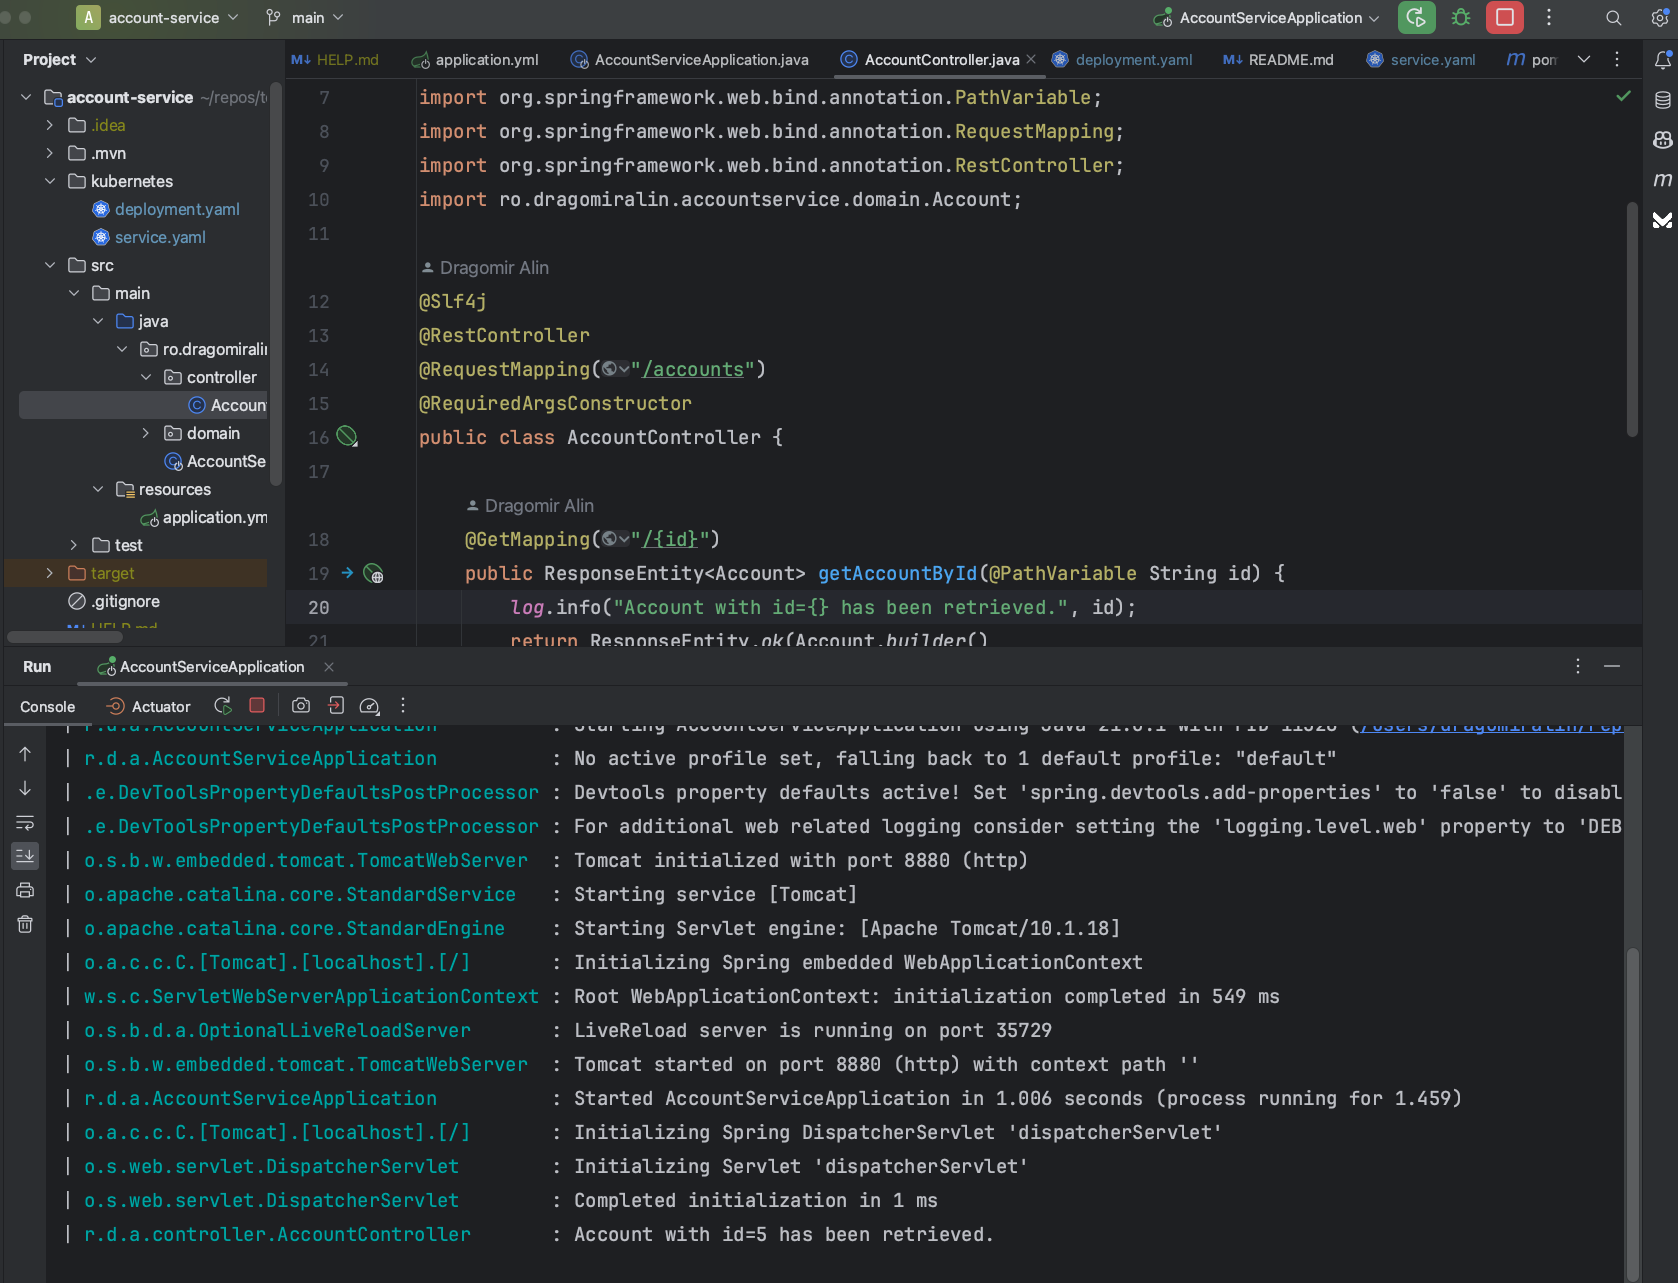
We have several microservices running on Kubernetes, we want to debug account-service locally. We can use Telepresence
to intercept the microservice and debug it locally.
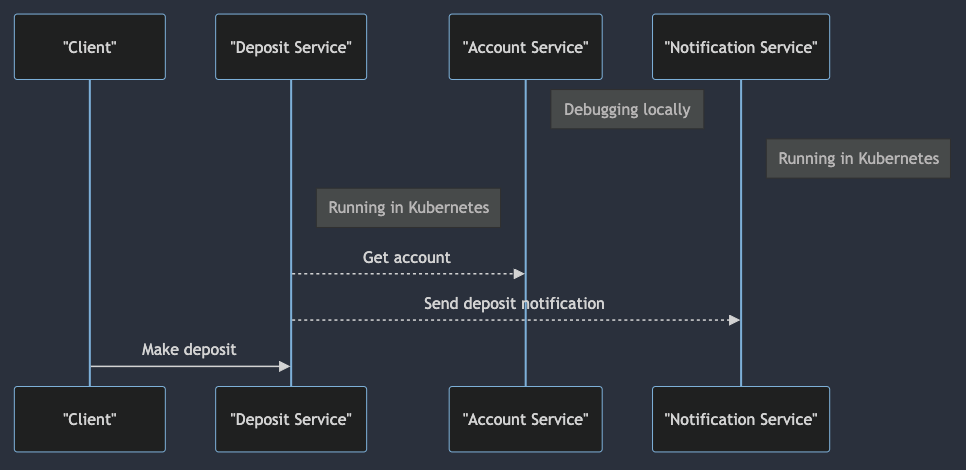
We will make a request to deposit-service(running on kubernetes) and deposit-service will call account-service. We
want to debug account-service locally.
Start account-service locally in our IDE.
Let’s start by intercepting the account-service.
1
2
3
4
5
6
7
8
9
10
telepresence intercept account-service --port 8880:8880

Using Deployment account-service
   Intercept name         : account-service
   State                  : ACTIVE
   Workload kind          : Deployment
   Destination            : 127.0.0.1:8880
   Service Port Identifier: http
   Volume Mount Error     : sshfs is not installed on your local machine
   Intercepting           : all TCP connections
If you don’t have your application exposed externally, you can use the following command to access the deposit-service
API.
1
2
3
4
kubectl port-forward svc/deposit-service 8881:8881
Forwarding from 127.0.0.1:8881 -> 8881
Forwarding from [::1]:8881 -> 8881
Handling connection for 8881
Let’s call the deposit-service(running on kubernetes) endpoint.
1
2
3
4
5
6
7
8
http POST http://localhost:8881/deposits accountId=5 amount=5

{
    "accountId": 5,
    "amount": 5.0,
    "id": 5,
    "status": "DEPOSITED"
}
deposit-service will call account-service and we can debug the code locally.
Clean up the Telepresence agent.
1
telepresence uninstall --agent account-service
As you can see, Telepresence is a great tool to speed up the development workflow on Kubernetes.
